(Added crafting info) |
No edit summary Tag: Visual edit |
||
| (36 intermediate revisions by 5 users not shown) | |||
| Line 1: | Line 1: | ||
| + | <div style="background:#2a1e0b; border:#513810 5px solid; border-radius:15px; width:350px; text-align:center; padding:10px; margin:0 0 1em 1em; color:#a98244; text-shadow:0px 2px 0px #281806; font-family:Baloo Paaji; font-size:15px;"><big style="color:#ee5671">! WORK IN PROGRESS !</big><br/> |
||
| − | = WORK IN PROGRESS = |
||
| + | <small>''Sorry for all the redlinks; I (the editor) will start on those pages once I finish this one.''</small></div> |
||
| ⚫ | |||
| ⚫ | |||
| + | |||
| + | If you have [https://starve.io starve.io] open in another tab and you need to quickly get some information, here are the quick links: |
||
| + | |||
| + | *[[File:Starter2.png|30x30px]] [[Guide_for_beginners/Getting Started|Getting Started]] |
||
| + | *[[File:Winter_fox.png|30x30px]] [[Strategy for Surviving the Winter Biome|Surviving the Winter Biome]] |
||
| + | *[[File:Day-lava-dragon-sword.png|35x35px]] [[Guide_for_beginners/Crossing the Lava|Crossing the Lava]] |
||
| + | *[[File:Day-sandworm2.png|28x28px]] [[Guide_for_beginners/Surviving the Desert|Surviving the Desert]] |
||
| + | *[[File:Medal_basebuilder.png|27x27px]] [[Guide_for_beginners/Making a Base & Farming|Making a Base]] |
||
| + | *[[File:Planted_Carrot.png|30x30px]] [[Guide_for_beginners/Making a Base & Farming|The Farm System]] |
||
| + | *[[File:Chrono.png|30x30px]] [[Guide_for_beginners/Completing the Quests|Completing the Quests]] |
||
| + | *[[File:Day-plane.png|38x38px]] [[Guide_for_beginners/Transportation|Transportation]] |
||
| + | *[[File:Inv_totem.png|27x27px]]<sup>need a better image</sup> [[Guide_for_beginners/Teaming|Teaming]] |
||
| + | *[[File:Amethyst_Helmet_Vector.png|28x28px]] [[Guide_for_beginners/Combat|Combat]] |
||
| + | *[[File:Golden-bread.png|28x28px]] [[Guide_for_beginners/Getting Golden Bread|Getting Golden Bread]] |
||
| + | *[[File:Halloween6.png|30x30px]] [[Guide_for_beginners/Other_Gamemodes|Other Gamemodes]] |
||
| + | |||
| + | Otherwise, read on! |
||
| + | |||
| + | ==Introduction== |
||
Here is the fundamental strategy of the game: |
Here is the fundamental strategy of the game: |
||
| − | * |
+ | *Players must [[Player_Status_Bars#Food|eat]], [[Player_Status_Bars#Water|drink]], and regulate their [[Temperature_Bar|temperature]] in order to survive. They must also evade or kill [[Mobs|monsters]] or other [[Player|players]] that wish to kill them. Better [[resources]] and [[:Category:Equipment|equipment]] must be obtained by exploring all of the [[biomes]] and killing a multitude of [[mobs]], and for the best equipment, completing the [[Chrono Quests]]. |
| − | * |
+ | *There is also a [[farming]] element to the game, which gives lots of [[resources]], especially [[food]]. Players may wish to build a [[base]] to protect themselves from dangerous mobs and players. Players earn [[points]] for killing mobs and other players, harvesting resources, and completing quests. |
| − | * |
+ | *Items may be [[Recipes|crafted]] out of various [[resources]], [[items]], and [[Drops|mob drops]]. Crafting is an essential element of the game, and also gives points. |
| − | * |
+ | *Upon [[death]], players receive [[Golden Bread]] equal to the number of points they had when they died divided by 1000{{#tag:ref|Points obtained by killing players only give 1/3 the golden bread.|group=note}} (minus any remainder). Golden Bread may be used to buy [[Cosmetics]]. |
| + | |||
| + | This guide contains several sub-guides, each focused on a specific stage or aspect of the game. Here are the links to them as well as their summaries: |
||
| + | |||
| + | *'''[[Guide_for_beginners/Getting Started|Getting Started]]''': Here you will learn tips to surviving in the [[Forest]], as well as how to obtain the basic [[tools]] neccessary to advance to the [[Guide_for_beginners/Into the Winter|next stage]]. |
||
| + | *'''[[Guide_for_beginners/Into the Winter|Into the Winter]]''': Here you will learn what you need to survive in the [[Winter]], how to fight the winter [[mobs]], and how to get some [[diamond]] and [[amethyst]] for yourself. |
||
| + | *'''[[Guide_for_beginners/Crossing the Lava|Crossing the Lava]]''': Here you will learn how to cross the [[Lava Biome]] to get to the [[reidite]], how to fight the lava [[mobs]], and how to stay alive without [[Temperature Bar|overheating]]. |
||
| + | *'''[[Guide_for_beginners/Surviving the Desert|Surviving the Desert]]''': Here you will learn how to live in the [[Desert]], including surviving the [[Sandworm|Sandworms]], [[Vulture|Vultures]], and [[Sandstorm|sandstorms]], and how to get some [[Emerald|emeralds]] and what to do with them. |
||
| + | *'''[[Guide for beginners/Making a Base|Making a Base]]''': Here you will learn how to make a safe and secure [[base]], protect yourself against attacks, and where to put your farms. |
||
| + | *'''[[Guide For Beginners/The Farm System|The Farm System]]''': Here you will learn about the farm system in detail, including tips about both basic and advanced farming techniques to get you the most [[resources]] (not just food!). |
||
| + | *'''[[Guide_for_beginners/Completing the Quests|Completing the Quests]]''': Here you will learn tips on completing the tricky [[Chrono Quests]], along with guides to completing multiple at a time. |
||
| + | *'''[[Guide_for_beginners/Transportation|Transportation]]''': Here you will learn ways to speed up your travel, mainly by using [[Vehicles]] and [[Saddle|Tamed Animals]]. |
||
| + | *'''[[Guide_for_beginners/Teaming|Teaming]]''': Here you will learn how to know when to trust others and what you can do with alliances. |
||
| + | *'''[[Guide_for_beginners/Combat|Combat]]''': Here you will learn tips on combat, against both [[Player|players]] and [[mobs]]. |
||
| + | *'''[[Guide_for_beginners/Getting Golden Bread|Getting Golden Bread]]''': Here you will learn about the best ways to farm [[Golden Bread]]. |
||
| + | *'''[[Guide_for_beginners/Other_Gamemodes|Other Gamemodes]]''': Here you will learn about the other [[:Category:Gamemodes|gamemodes]], their unique play-styles, and tips on advancing the furthest in them. |
||
| + | |||
| + | |||
| + | == [[Tools]] == |
||
| + | |||
| + | === [[Pickaxes]] === |
||
| + | |||
| ⚫ | |||
| + | |||
| ⚫ | |||
| ⚫ | |||
| ⚫ | #[[File:Inv_gold.png|30px]] [[Gold]]: A middle-tier resource found in all biomes except the [[Ocean]]. Used to craft its respective [[:Category:Equipment|equipment]] and [[structures]] as well as a number of special types of [[:Category:Clothing|clothing]] and [[structures]]. Alternatively, you can sell one [[bread]] for 6 gold on the [[market]]. |
||
| ⚫ | #[[File:Inv_diamond.png|30px]] [[Diamond]]: A rare resource only obtainable at the top of the [[Winter]]. Used to craft its respective [[:Category:Equipment|equipment]] and [[structures]], as well as [[Blue Thread]] and the [[Resurrection Stone]]. Alternatively, you can sell four [[carrot|carrots]] for 1 diamond on the [[market]]. |
||
| ⚫ | #[[File:Inv_amethyst.png|30px]] [[Amethyst]]: A rare resource only obtainable in the [[Cave|Winter Cave]] and the [[Lava Biome]]. Used to craft its respective [[:Category:Equipment|equipment]] and [[structures]]. Alternatively, you can sell eight [[tomato|tomatoes]] for 1 amethyst on the [[market]]. |
||
| ⚫ | #[[File:Inv_reidite.png|30px]] [[Reidite]]: A very rare resource only obtainable in the corner of the [[Lava Biome]]. Like Amethyst, used to craft only its respective [[:Category:Equipment|equipment]] and [[structures]]. Alternatively, you can sell sixteen [[Thorn Bush|thorn bushes]] for 1 reidite on the [[market]]. |
||
| ⚫ | |||
| + | |||
| + | [[Pickaxes]] are able to mine all [[resources]] that are one tier above or lower. Each pickaxe is crafted using the pickaxe of the tier below (except for [[Pickaxes#Wooden_Pickaxe|wooden]] ones) and a certain amount of 3 tiers of resources, one of which is the tier of the [[pickaxes|pickaxe]], and the other two are the [[resources]] of the two previous tiers (if existing). Emerald is considered to be the same tier as reidite, but is not used to craft any [[tools]]. Both [[Pickaxes#Amethyst_Pickaxe|amethyst]] and [[Pickaxes#Reidite_Pickaxe|reidite pickaxes]] are able to mine all tiers of [[resources]]. However, better [[pickaxes]] are able to mine more resources at a time, as illustrated in this chart: |
||
| + | |||
| + | {| class="wikitable" |
||
| + | |+ Resources mined at a time, by tier of pickaxe |
||
| + | |- |
||
| + | ! Resource !! Hand !! [[Pickaxes#Wooden_Pickaxe|Wooden Pickaxe]] !! [[Pickaxes#Stone_Pickaxe|Stone Pickaxe]] !! [[Pickaxes#Golden_Pickaxe|Golden Pickaxe]] !! [[Pickaxes#Diamond_Pickaxe|Diamond Pickaxe]] !! [[Pickaxes#Amethyst_Pickaxe|Amethyst Pickaxe]] !! [[Pickaxes#Reidite_Pickaxe|Reidite Pickaxe]] |
||
| + | |- |
||
| + | | '''[[Wood]]''' || 1 || 2 || 3 || 4 || 5 || 6 || 7 |
||
| + | |- |
||
| + | | '''[[Stone]]''' || 0 || 1 || 2 || 3 || 4 || 5 || 6 |
||
| + | |- |
||
| + | | '''[[Gold]]''' || 0 || 0 || 1 || 2 || 3 || 4 || 5 |
||
| + | |- |
||
| + | | '''[[Diamond]]''' || 0 || 0 || 0 || 1 || 2 || 3 || 4 |
||
| + | |- |
||
| + | | '''[[Amethyst]]''' || 0 || 0 || 0 || 0 || 1 || 2 || 3 |
||
| + | |- |
||
| + | | '''[[Reidite]] & [[Emerald]]''' || 0 || 0 || 0 || 0 || 0 || 1 || 2 |
||
| + | |} |
||
| + | |||
| ⚫ | |||
| + | |||
| + | The basic types of weapons include the [[Swords|Sword]] and the [[Spears|Spear]]. When comparing swords and spears of the same tier, swords deal higher damage but spears have far more range, and can even attack through [[walls]]. They are similar to [[Pickaxes]] in that they are crafted using the weapon of the previous tier, a certain amount of the resource of the current tier, and a certain amount of the resources of the previous 2{{#tag:ref|The [[Diamond Spear]] has an exception to this rule: it uses [[wood]] instead of [[stone]] as the 3rd resource in its crafting recipe.|group=note}} tiers (if existing). |
||
| + | |||
| + | Here is a chart showing the damage dealt by swords and spears of each tier: |
||
| + | |||
| + | {| class="wikitable" |
||
| + | |- |
||
| + | ! Tier !! Sword !! Spear |
||
| + | |- |
||
| + | | Wood || [[File:New_inv_sword_wood.png|20px|alt=Wooden Sword]] [[Wooden_Sword|12]] || [[File:New_inv_spear_wood.png|20px|alt=Wooden Spear]] [[Wooden_Spear|10]] |
||
| + | |- |
||
| + | | Stone || [[File:New_inv_sword_stone.png|20px|alt=Stone Sword]] [[Stone_Sword|19]] || [[File:New_inv_spear_stone.png|20px|alt=Stone Spear]] [[Stone_Spear|14]] |
||
| + | |- |
||
| + | | Gold || [[File:New_inv_sword_gold.png|20px|alt=Golden Sword]] [[Golden_Sword|22]] || [[File:New_inv_spear_gold.png|20px|alt=Golden Spear]] [[Golden_Spear|15]] |
||
| + | |- |
||
| + | | Diamond || [[File:New_inv_sword_diamond.png|20px|alt=Diamond Sword]] [[Diamond_Sword|24]] || [[File:New_inv_spear_diamond.png|20px|alt=Diamond Spear]] [[Diamond_Spear|17]] |
||
| + | |- |
||
| + | | Amethyst || [[File:New_inv_sword_amethyst.png|20px|alt=Amethyst Sword]] [[Amethyst_Sword|27]] || [[File:New_inv_spear_amethyst.png|20px|alt=Amethyst Spear]] [[Amethyst_Spear|18]] |
||
| + | |- |
||
| + | | Reidite || [[File:1nv-reidite-sword-in.png|20px|alt=Reidite Sword]] [[Reidite_Sword|30]] || [[File:1nv-reidite-spear-in.png|20px|alt=Reidite Spear]] [[Reidite_Spear|22]] |
||
| + | |} |
||
| + | |||
| + | Additionally, more powerful weapons may be crafted using items obtained from [[Guide_for_beginners#Chrono_Quests|Chrono Quests]] such as the [[Blue Orb]] and the [[Lava Orb]], which are used to craft the [[Dragon Sword]][[Dragon_Spear|/Spear]] and [[Lava Sword]][[Lava Spear|/Spear]], respectively. There is also a [[Crab Spear]], crafted from [[Crab Claws]], which, in conjunction with the [[Crab Helmet]], gives the user a frightening level of control over [[Crab|Crabs]]. Finally, there is the [[Pirate Sword]], which is a rare item only obtainable by breaking [[Treasure_Chest|treasure chests]], dealing 24 damage, the same as a [[Diamond_Sword|diamond sword]], but with a longer range, though less than that of [[spears]]. Wearing the [[Helmets|helmet]] that corresponds to the weapon (e.g. [[Dragon Helmet]], [[Crab Helmet]], [[Lava Helmet]]) gives the weapon of that type a damage boost. This effect does not occur with the standard tiered [[weapons]]. Note that dragon weapons only get this buff from the dragon helmet, not the lava helmet; therefore, it is best to upgrade your weapon before your helmet. |
||
| + | |||
| + | {| class="wikitable" |
||
| + | |- |
||
| + | ! Weapon !! Damage || Damage with corresponding Helmet |
||
| + | |- |
||
| + | | [[File:Inv_sword dragon.png|20px|alt=Dragon Spear]] '''[[Dragon Sword]]''' || 30 || 33 |
||
| + | |- |
||
| + | | [[File:Inv_spear_dragon.png|20px|alt=Dragon Spear]] '''[[Dragon Spear]]''' || 22 || 24 |
||
| + | |- |
||
| + | | [[File:Inv-lava-dragon-sword-in.png|20px|alt=Lava Sword]] '''[[Lava Sword]]''' || 33 || 36 |
||
| + | |- |
||
| + | | [[File:Inv-lava-spear-in.png|20px|alt=Lava Spear]] '''[[Lava Spear]]''' || 24 || 26 |
||
| + | |- |
||
| + | | [[File:Crab Spear.png|20px|alt=Crab Spear]] '''[[Crab Spear]]''' || 14 || 24 (Only when riding a [[King Crab]]) |
||
| + | |} |
||
| + | |||
| + | === Other tools === |
||
| + | |||
| + | Other examples of tools include the [[Hammers]], [[Helmets]], [[Bows]] & [[Arrows]], [[Shields]], [[Shovels]], [[Pitchfork]] & [[Golden Pitchfork]], [[Machete]], and the [[Book]]. |
||
| + | * [[File:Hammer.png|28px]] '''Hammers''' are used to destroy [[Structures|buildings]] quickly and efficiently. There are 6 tiers: [[Hammers|stone]], [[Hammers#Golden_Hammer|gold]], [[Hammers#Diamond_Hammer|diamond]], [[Hammers#Amethyst_Hammer|amethyst]], [[Hammers#Reidite_Hammer|reidite]], and the [[Hammers#Super_Hammer|Super Hammer]], crafted with [[Kraken Skin]], which is a very difficult item to obtain. |
||
| + | * [[File:Inv-gold-bow-out.png|28px]] '''Bows''' are used to shoot [[Arrows]]. Both Bows and Arrows are tiered; bows may shoot any arrow of the same tier or lower. There are 7 tiers: the [[Bows#Wooden_Bow|wooden bow]] & [[Arrows#Wooden_Arrow|arrow]], [[Bows#Stone_Bow|stone bow]] & [[Arrows#Stone_Arrow|arrow]], [[Bows#Golden_Bow|golden bow]] & [[Arrows#Golden_Arrow|arrow]], [[Bows#Diamond_Bow|diamond bow]] & [[Arrows#Diamond_Arrow|arrow]], [[Bows#Amethyst_Bow|amethyst bow]] & [[Arrows#Amethyst_Arrow|arrow]], [[Bows#Reidite_Bow|reidite bow]] & [[Arrows#Reidite_Arrow|arrow]], and the [[Bows#Dragon_Bow|Dragon bow]] & [[Arrows#Dragon_Arrow|arrow]]. The higher tiers of arrows deal moderate player damage but extremely high amounts of mob damage due to their high costs. |
||
| + | * [[File:Inv_diamond_shield.png|28px]] '''Shields''' are used to reduce incoming damage from [[player|players]] and [[mobs]]. Effects stack with [[helmets]]. There are 6 tiers: [[Shields#Wooden_Shield|wooden shield]], [[Shields#Stone_Shield|stone shield]], [[Shields#Golden_Shield|golden shield]], [[Shields#Diamond_Shield|diamond shield]], [[Shields#Amethyst_Shield|amethyst shield]], and [[Shields#Reidite_Shield|reidite shield]]. They offer weak protection against [[swords]] and [[spears]], but are highly effective against [[mobs]] and [[bows]]. |
||
| + | * [[File:Shovel.png|28px]] '''Shovels''' are used to harvest the 3 ground-based resources: [[dirt]] in the [[Forest]] and [[Lava Biome]], [[ice]] in the [[Winter]], and [[sand]] in the [[Beach]], [[Islands]], and [[Desert]]. Like [[Hammers]], the first tier is [[Shovels#Stone_Shovel|stone]], harvesting 1 of the respective ground type per use. The next 3 tiers are [[Shovels#Golden_Shovel|gold]], [[Shovels#Diamond_Shovel|diamond]], and [[Shovels#Amethyst_Shovel|amethyst]]. Having 4 tiers in total, each consecutive tier mines 1 more of the [[Biomes|biome]]'s respective resource. |
||
| + | * [[File:Inv_golden_pitchfork.png|28px]] The '''Pitchfork''' & '''Golden Pitchfork''' deal zero player and mob damage, but multiply the amount of crops given when harvested: the Pitchfork multiplies them by two, and the Golden Pitchfork multiplies them by three. |
||
| + | * [[File:Inv-machete-out.png|28px]] The '''Machete''' deals low player and mob damage, but harvests double the [[drops]] from [[Mob_Box|mob boxes]]. |
||
| + | * [[File:Inv_book.png|28px]] The '''Book''', when held, reduces [[Recipes|crafting]] times to 1/3 of their original duration. |
||
| + | * [[File:Inv-mount-boar-out.png|28px]] '''Vehicles''' and '''Tamed Animals''', which increase the player's speed depending on the biome and may allow the player to fly. All neutral animals except normal [[Crab|crabs]] may be tamed with a [[saddle]] by hitting the animal, but players are more likely to anger the animal than to tame it. The [[Baby Lava Dragon]] is the hardest animal in the game to tame, with a 0.2% success rate. The chance of successfully taming an animal may be increased with the [[Crown of Luck]]. Vehicles, like most other items, are simply crafted. |
||
| + | |||
| + | == [[:Category:Clothing|Clothing]] == |
||
| + | |||
| + | '''Clothing''' are items that offer benefits to the player when worn. These benefits may include warming up or cooling down the player, decreasing incoming damage, increasing speed when riding vehicles/tamed animals, and more. The types of clothing include: |
||
| + | |||
| + | * [[File:Inv_diamond_helmet.png|25px]] '''[[Helmets]]''': Used to reduce incoming damage from [[Player|players]] and [[mobs]]. Effects stack with [[shields]]. There are 9 tiers: [[Wooden_Helmet|wooden helmet]], [[Stone_Helmet|stone helmet]], [[Golden_Helmet|golden helmet]], [[Diamond_Helmet|diamond helmet]], [[Crab_Helmet|crab helmet]], [[Amethyst_Helmet|amethyst helmet]], [[Reidite_Helmet|reidite helmet]], [[Dragon_Helmet|dragon helmet]] and [[Lava_Helmet|lava helmet]]. The higher the tier, the more protection it will grant. They offer the same weak protection against [[Player|players]] as [[shields]] do{{#tag:ref|Unlike [[shields]], [[helmets]] do not protect the player against [[Bows|arrows]] any more than they do with normal melee attacks.|group=note}} (extended to the [[Helmets#Dragon_Helmet|dragon]] and [[Helmets#Lava_Helmet|lava]] tiers), and provide high mob damage protection. In fact, players are immune to [[spider]] attacks when wearing the [[Helmets#Lava_Helmet|lava helmet]]. |
||
| + | * [[File:Chapkas.png|25px]] '''[[Chapkas]]''', [[File:Inv_amethyst_protection.png|25px]] '''[[Heat Protections]]''', [[File:Inv_desert_cap.png|25px]] '''[[Turbans]]''', and [[File:Diving_suits.png|25px]] '''[[Diving Gear]]''': Used to reduce [[Temperature_Bar|heat loss]], heat gain, heat gain & loss in the [[Desert]], and heat loss in the [[Ocean]]/[[Lake|lakes]]/[[river]], respectively. Chapkas also reduce damage from [[Blizzard|blizzards]], Turbans reduce damage from [[Sandstorm|sandstorms]], and Diving Gear also reduces the loss of [[Player_Status_Bars#Oxygen|oxygen]] while in water. More information on each of these items is available at [[Temperature_Bar|this page]]. |
||
| + | * [[File:Tunics.png|25px]] '''[[Peasants' Tunics|Peasants]]''' and [[File:Hoods.png|25px]] '''[[Hoods]]''': 2 opposing types of clothing each with 2 tiers: Normal and Winter. Peasants increase the rate at which the player's crops grow: 20% for the [[Peasant's Tunic]] and 40% for the [[Winter Peasant's Tunic]]. Peasants also prevent stealing from other players with a Hood of the same tier. Hoods allow players to steal a random stack of items{{#tag:ref|Equipped items ([[tools]] held in hand, [[:Category:Clothing|clothing]] being worn, or [[vehicles]] being ridden) may not be stolen using either [[Hoods|hood]].|group=note}} from another player by hitting them when under 5 conditions: |
||
| + | *# It is [[Daylight_Cycle|nighttime]]. |
||
| + | *# The victim is not in range of a [[Fires|fire]]. |
||
| + | *# The stealer is not holding anything in their hand. |
||
| + | *# The stealer has not equipped their hood, stolen from a player, or taken damage in the last 8 seconds if they have a normal [[Hood]], or 4 seconds if they have a [[Winter Hood]]. |
||
| + | *# The victim is not wearing a Peasant of the same tier or higher ([[Peasant's Tunic]] blocks [[Hood]], [[Winter Peasant's Tunic]] blocks Hood and [[Winter Hood]]) |
||
| + | *: Hoods and Peasants can also act as [[Chapkas]]. Normal Hoods and Peasants typically offer the same warm and blizzard protection as [[Earmuffs]]; Winter tier Hoods and Peasants have properties that typically correspond to those of the [[Coat]]. There are a few exceptions, which you can read about in [[Temperature_Bar|this article]]. |
||
| + | * [[File:Inv_pilot_hat.png|25px]] '''Vehicle Control Equipment''':<sup>''These need a better name. [https://starveiopro.fandom.com/wiki/Guide_for_beginners?veaction=edit Any suggestions]?''</sup> These help you when riding [[Vehicles]] or Tamed Animals. These include the [[Pilot Hat]], which allows you to take off and accelerate faster when flying, and also acts as a good [[Chapkas|chapka]] and excellent [[Turbans|turban]]; and the [[Pirate Hat]], which increases your speed on a [[Boat]], and also warms you in the water. |
||
| + | * '''[[Crowns]]''': Crowns come in 3 types: [[Crown of Life]], [[Crown of Luck]], and [[Crown of the Angel]], which are crafted using 200 gold and the [[Green Gem]], [[Orange Gem]], and [[Blue Gem]], respectively. The Crown of the Angel's recipe also requires 1 [[Dragon Heart]]. Each grant special powers to the wearer, as well as offer moderate protection against most forms of damage, just like [[Helmets]]{{#tag:ref|The crowns of Life and Luck offer the same level of protection against player damage as the [[Golden Helmet]]; the Crown of the Angel offers player damage protection equivalent to that of the [[Stone Helmet]]. Against mobs, all crowns give a level of protection halfway between the Golden and [[Diamond_Helmet|Diamond]] helmets.|group=note}}. |
||
| + | ** [[File:Inv_life_crown.png|25px]] The '''Crown of Life''' causes the wearer to regenerate 40 units (20%) of their [[Player_Status_Bars#Life|health]] every 2 ticks or 10 seconds, which is 33% faster than [[Bandage|bandages]] and with unlimited supply. However, to get the Green Gem required to craft this item, the player must not lose any health at all for 4 [[Daylight_Cycle|days]] or 32 minutes, making this an expensive but powerful item. |
||
| + | ** [[File:Inv_luck_crown.png|25px]] The '''Crown of Luck''' increases the wearer's likelihood that a number of chance-based procedures will succeed. These include obtaining special resources with a [[Shovels|shovel]] (x{{idk}} chance), successfully taming a mob with a [[saddle]] (x5 chance), and getting higher-value loot from [[Treasure Chest|treasure chests]]. |
||
| + | ** [[File:Inv_angel_crown.png|25px]] The '''Crown of the Angel''' protects players from [[death]] by turning them into a ghost upon receiving fatal damage. As a ghost, the player may not interact with any players, mobs, or structures; their goal is to reach a [[Resurrection Stone]] within 1 minute of becoming a ghost. The player will fully die if they have not reached a resurrection stone after 60 seconds. If resurrected, the player will lose all of their [[weapons]] (including any [[Hammers#Super_Hammer|super hammers]]) and two-thirds of their [[Points|score]]. Players also turn into ghosts upon death if they have a [[Dragon Heart]] in their inventory, but the dragon heart will be consumed upon resurrection, while this Crown may be used indefinitely. |
||
| + | * '''[[Miscellaneous Clothing|Other]]: |
||
| + | *: [[File:Inv_bag.png|25px]] The '''[[Bag]]''': This item is automatically equipped when crafted, and can not be removed. In fact, it has no [[Items|item]] form at all, meaning that you can only craft it once, immediately equipping it for the remainder of the game (until you die). However, you may still equip other items of [[:Category:Clothing|clothing]] while this item is worn. Thus, it does not affect your gameplay at all except by giving you 6 more inventory slots, allowing you to carry 16 different types of items rather than 10. This item is essential for late-game, and makes middle and early-game significantly easier. It is crafted with 5 [[Wolf_Fur|wolf fur]] and 6 [[cord]], making it an item that can be crafted in the [[Forest]] right after the start of the game, just by killing a few [[Wolf|wolves]] and [[Spider|spiders]]. |
||
| + | *: [[File:Inv_explorerhat.png|25px]] The '''[[Explorer's Hat]]''': This item, when equipped, prevents all [[mobs]] from seeing you. This effect, however, is disabled for {{idk}} seconds when the player hits/attacks. However, this item does not protect the player from [[Player_Status_Bars#Life|mob damage]]; running through mobs, while they will not chase you, can still cause damage to the wearer. |
||
| + | == [[Biomes]] == |
||
| + | [[Biomes]] are different places in the world of [[Game|Starve.io]]. There are four biomes existing in this game: Forest, Winter, Lava, and Desert (and also Ocean). |
||
| + | |||
| + | [[File:Forest.png|left|thumb|173x173px|Starver in the Forest]] |
||
| + | |||
| + | == [[Forest]] == |
||
| + | The [[Forest]] is the biome that you spawn in. It contains the basic materials to progress through the game. [[Tree|Trees]], [[Stone|stones]], [[gold]], and [[berries]] are the resources that spawn here. [[Wolf|Wolves]], [[Spider|spiders]], [[Rabbit|rabbits]], and [[Boar|boars]] also spawn here. The Forest biome also has a [[beach]], located on the right side of the biome. This is where you can get [[sand]]. [[Crab|Crabs]] and [[King Crab|King Crabs]] spawn here. It also contains bodies of water that replenish your [[Player Status Bars|thirst bar]], but don't stay there for too long because you'll lose temperature faster than normal and you'll also lose oxygen over time. When the oxygen bar is empty you'll lose health. |
||
| + | [[File:Winter.png|left|thumb|A starver in the winter]] |
||
| + | |||
| + | == [[Winter]] == |
||
| + | The [[Winter]] is different from all biomes because it lowers your [[Temperature Bar|temperature]] by a high amount. You might need a [[Chapkas|Chapka]] to survive here (at least an [[Earmuffs|Earmuff]]). This biome contains some resources to support you progress in the winter. It contains [[Tree|Trees]], [[Stone|stones]], [[gold]], [[diamond]], and [[amethyst]]. This biome does not contains any food sources apart from animals which means you have to get a great amount of food supply. [[Arctic Fox|Arctic Foxes]], [[Polar Bear|Polar Bears]], and [[Penguin|Penguins]] spawn in the outskirts of the Winter biome. Beware, [[Blizzard|blizzards]] can happen here, damaging you. You need [[Roof|roofs]] to stop the [[blizzard]] from damaging you. The Winter Biome has a [[cave]] that is located the far north of the biome. This is where you can get [[Diamond]] (<ref>Note (Winter)</ref>You can still get diamond near outside the [[cave]]) and [[Amethyst]] (You can get amethyst in [[Lava Biome]] too). In the [[Cave]], [[Baby Dragon|Baby Dragons]] and [[Dragon|Dragons]] spawn here. But I may warn you, savage players roam here and you might get killed and lose your valuable progress. |
||
| + | [[File:LavaBiomeOverview.PNG|left|thumb|Starver in the Lava Biome]] |
||
| + | |||
| + | == [[Lava Biome]] == |
||
| + | The [[Lava Biome]] is a challenging biome to explore, one thing is your temperature bar, it rises fast even if it's night. This is also where you can only gather [[Reidite]]. It contains [[Stone|stones]], [[gold]], [[amethyst]] and [[reidite]] only. It has three mobs: [[Lava Monster]], [[Baby Lava Dragon]], and [[Lava Dragon]]. The technique to survive here is to get loads of [[Ice Cube|Ice]] (100 or more will work). You may use [[Heat Protections]], but it's just a waste of time and resources. Most players travel to Lava Biome first before Desert for better gear. The [[Reidite]] is located at the top right corner of the biome, being surrounded by lava. So you basically need [[Bridge|Bridges]] to cross the lava. |
||
| + | [[File:Day-desert.png|left|thumb|Starver in the Desert]] |
||
| + | |||
| + | == [[Desert]] == |
||
| + | The [[Desert]] is the fourth and final biome in Starve.io. It is similar to Lava and Winter Biome because of it's temperature-rising feature and [[Sandstorm|sandstorms]]. It contains [[Cactus|Cacti]], [[Stone|Stones]], [[Aloe Vera]], and [[Emerald]]. It also has an [[THE OASES|Oasis]] that has a body of water and has [[Tree|Trees]] and [[Stone|Stones]] aswell. You can only gather [[Emerald]] in the Desert Biome, you can only mine it with a [[Pickaxes|Amethyst Pickaxe]] or higher. The [[Emerald]] is located at the bottom right corner of the biome. The key to survive is [[Roof|roofs]] for [[Sandstorm|sandstorms]], and [[Ice Cube|Ice]] for [[Temperature Bar|Temperature]]. [[Vulture|Vultures]] and [[Sandworm|Sandworms]] spawn in this biome. |
||
| + | |||
| + | [[File:Ocean.png|left|thumb|Starver in the Ocean]] |
||
| + | == [[Ocean]] == |
||
| ⚫ | |||
| + | The [[Ocean]] surrounds the whole [[map]], and makes you slower like the water bodies in the [[Desert]] and [[Forest]] Biome. No resources spawn here. But, it has 8 [[Island|Islands]] that you can get resources from. Most of them contain [[Tree|Trees]], [[Stone|Stones]], and [[Berries]]. One of them has a mini lava pond (the island that is closest to [[Lava Biome]]). The islands also have (sometimes) [[Treasure Chest|Treasure Chests]]. |
||
| ⚫ | |||
| ⚫ | |||
| ⚫ | |||
| ⚫ | |||
| ⚫ | |||
| ⚫ | |||
| ⚫ | |||
| + | Containing different items like: [[Diving Gear|Diving Mask/Gear]] and [[Diving Suit|Super Diving Suit]]. It contains only two mobs: [[GMO Piranha|GMO Piranhas]] and [[Kraken|Krakens]]. The key to survive and traverse through different biomes via [[Ocean]] is using [[Diving Mask|Diving Mask/Gear]] or [[Diving Suit|Super Diving Suit]]. And again, beware of savages with [[Baby Dragon]]/[[Baby Lava Dragon]] who is chasing you in the ocean. |
||
| ⚫ | |||
| + | [[Category:Guides]] |
||
| − | <references group="note"></references> |
||
| + | [[Category:Player]] |
||
| + | [[Category:Starve.io Wiki]] |
||
Latest revision as of 07:56, 11 October 2023
Sorry for all the redlinks; I (the editor) will start on those pages once I finish this one.
Hello, and welcome to the Guide for Beginners! In this guide we will be covering the basics of the game, such as how to get that fancy lava gear everyone seems to have. Even if you don't think of yourself as a "beginner", you might still learn something here, so read on!
If you have starve.io open in another tab and you need to quickly get some information, here are the quick links:
 Getting Started
 Surviving the Winter Biome
 Crossing the Lava
 Surviving the Desert
- Making a Base
- The Farm System
- Completing the Quests
- Transportation
- need a better image Teaming
- Combat
- Getting Golden Bread
- Other Gamemodes
Otherwise, read on!
Introduction
Here is the fundamental strategy of the game:
- Players must eat, drink, and regulate their temperature in order to survive. They must also evade or kill monsters or other players that wish to kill them. Better resources and equipment must be obtained by exploring all of the biomes and killing a multitude of mobs, and for the best equipment, completing the Chrono Quests.
- There is also a farming element to the game, which gives lots of resources, especially food. Players may wish to build a base to protect themselves from dangerous mobs and players. Players earn points for killing mobs and other players, harvesting resources, and completing quests.
- Items may be crafted out of various resources, items, and mob drops. Crafting is an essential element of the game, and also gives points.
- Upon death, players receive Golden Bread equal to the number of points they had when they died divided by 1000[note 1] (minus any remainder). Golden Bread may be used to buy Cosmetics.
This guide contains several sub-guides, each focused on a specific stage or aspect of the game. Here are the links to them as well as their summaries:
- Getting Started: Here you will learn tips to surviving in the Forest, as well as how to obtain the basic tools neccessary to advance to the next stage.
- Into the Winter: Here you will learn what you need to survive in the Winter, how to fight the winter mobs, and how to get some diamond and amethyst for yourself.
- Crossing the Lava: Here you will learn how to cross the Lava Biome to get to the reidite, how to fight the lava mobs, and how to stay alive without overheating.
- Surviving the Desert: Here you will learn how to live in the Desert, including surviving the Sandworms, Vultures, and sandstorms, and how to get some emeralds and what to do with them.
- Making a Base: Here you will learn how to make a safe and secure base, protect yourself against attacks, and where to put your farms.
- The Farm System: Here you will learn about the farm system in detail, including tips about both basic and advanced farming techniques to get you the most resources (not just food!).
- Completing the Quests: Here you will learn tips on completing the tricky Chrono Quests, along with guides to completing multiple at a time.
- Transportation: Here you will learn ways to speed up your travel, mainly by using Vehicles and Tamed Animals.
- Teaming: Here you will learn how to know when to trust others and what you can do with alliances.
- Combat: Here you will learn tips on combat, against both players and mobs.
- Getting Golden Bread: Here you will learn about the best ways to farm Golden Bread.
- Other Gamemodes: Here you will learn about the other gamemodes, their unique play-styles, and tips on advancing the furthest in them.
Tools
Pickaxes
There are 7 main tiers of resources obtainable by mining with a pickaxe:
- Wood: A very widely used resource, used to craft most structures and tools. Can be found in all major biomes except the Ocean and the Lava Biome. Alternatively, you can sell one berry for 3 wood on the market.
- Stone: Also very widely used, used to craft most tools and some structures. Can be found in all major biomes except the Ocean. Alternatively, you can sell one pumpkin for 4 stone on the market.
- Gold: A middle-tier resource found in all biomes except the Ocean. Used to craft its respective equipment and structures as well as a number of special types of clothing and structures. Alternatively, you can sell one bread for 6 gold on the market.
- Diamond: A rare resource only obtainable at the top of the Winter. Used to craft its respective equipment and structures, as well as Blue Thread and the Resurrection Stone. Alternatively, you can sell four carrots for 1 diamond on the market.
- Amethyst: A rare resource only obtainable in the Winter Cave and the Lava Biome. Used to craft its respective equipment and structures. Alternatively, you can sell eight tomatoes for 1 amethyst on the market.
- Reidite: A very rare resource only obtainable in the corner of the Lava Biome. Like Amethyst, used to craft only its respective equipment and structures. Alternatively, you can sell sixteen thorn bushes for 1 reidite on the market.
- Emerald: A very rare resource only obtainable in the corner of the Desert. Used to craft certain weapons and the Emerald Machine. It is the only resource that cannot be bought on the market.
Pickaxes are able to mine all resources that are one tier above or lower. Each pickaxe is crafted using the pickaxe of the tier below (except for wooden ones) and a certain amount of 3 tiers of resources, one of which is the tier of the pickaxe, and the other two are the resources of the two previous tiers (if existing). Emerald is considered to be the same tier as reidite, but is not used to craft any tools. Both amethyst and reidite pickaxes are able to mine all tiers of resources. However, better pickaxes are able to mine more resources at a time, as illustrated in this chart:
| Resource | Hand | Wooden Pickaxe | Stone Pickaxe | Golden Pickaxe | Diamond Pickaxe | Amethyst Pickaxe | Reidite Pickaxe |
|---|---|---|---|---|---|---|---|
| Wood | 1 | 2 | 3 | 4 | 5 | 6 | 7 |
| Stone | 0 | 1 | 2 | 3 | 4 | 5 | 6 |
| Gold | 0 | 0 | 1 | 2 | 3 | 4 | 5 |
| Diamond | 0 | 0 | 0 | 1 | 2 | 3 | 4 |
| Amethyst | 0 | 0 | 0 | 0 | 1 | 2 | 3 |
| Reidite & Emerald | 0 | 0 | 0 | 0 | 0 | 1 | 2 |
Weapons
The basic types of weapons include the Sword and the Spear. When comparing swords and spears of the same tier, swords deal higher damage but spears have far more range, and can even attack through walls. They are similar to Pickaxes in that they are crafted using the weapon of the previous tier, a certain amount of the resource of the current tier, and a certain amount of the resources of the previous 2[note 2] tiers (if existing).
Here is a chart showing the damage dealt by swords and spears of each tier:
| Tier | Sword | Spear |
|---|---|---|
| Wood | ||
| Stone | ||
| Gold | ||
| Diamond | ||
| Amethyst | ||
| Reidite |
Additionally, more powerful weapons may be crafted using items obtained from Chrono Quests such as the Blue Orb and the Lava Orb, which are used to craft the Dragon Sword/Spear and Lava Sword/Spear, respectively. There is also a Crab Spear, crafted from Crab Claws, which, in conjunction with the Crab Helmet, gives the user a frightening level of control over Crabs. Finally, there is the Pirate Sword, which is a rare item only obtainable by breaking treasure chests, dealing 24 damage, the same as a diamond sword, but with a longer range, though less than that of spears. Wearing the helmet that corresponds to the weapon (e.g. Dragon Helmet, Crab Helmet, Lava Helmet) gives the weapon of that type a damage boost. This effect does not occur with the standard tiered weapons. Note that dragon weapons only get this buff from the dragon helmet, not the lava helmet; therefore, it is best to upgrade your weapon before your helmet.
| Weapon | Damage | Damage with corresponding Helmet |
|---|---|---|
| 30 | 33 | |
| 22 | 24 | |
| 33 | 36 | |
| 24 | 26 | |
| 14 | 24 (Only when riding a King Crab) |
Other tools
Other examples of tools include the Hammers, Helmets, Bows & Arrows, Shields, Shovels, Pitchfork & Golden Pitchfork, Machete, and the Book.
- Hammers are used to destroy buildings quickly and efficiently. There are 6 tiers: stone, gold, diamond, amethyst, reidite, and the Super Hammer, crafted with Kraken Skin, which is a very difficult item to obtain.
- Bows are used to shoot Arrows. Both Bows and Arrows are tiered; bows may shoot any arrow of the same tier or lower. There are 7 tiers: the wooden bow & arrow, stone bow & arrow, golden bow & arrow, diamond bow & arrow, amethyst bow & arrow, reidite bow & arrow, and the Dragon bow & arrow. The higher tiers of arrows deal moderate player damage but extremely high amounts of mob damage due to their high costs.
- Shields are used to reduce incoming damage from players and mobs. Effects stack with helmets. There are 6 tiers: wooden shield, stone shield, golden shield, diamond shield, amethyst shield, and reidite shield. They offer weak protection against swords and spears, but are highly effective against mobs and bows.
- Shovels are used to harvest the 3 ground-based resources: dirt in the Forest and Lava Biome, ice in the Winter, and sand in the Beach, Islands, and Desert. Like Hammers, the first tier is stone, harvesting 1 of the respective ground type per use. The next 3 tiers are gold, diamond, and amethyst. Having 4 tiers in total, each consecutive tier mines 1 more of the biome's respective resource.
- The Pitchfork & Golden Pitchfork deal zero player and mob damage, but multiply the amount of crops given when harvested: the Pitchfork multiplies them by two, and the Golden Pitchfork multiplies them by three.
- The Machete deals low player and mob damage, but harvests double the drops from mob boxes.
- The Book, when held, reduces crafting times to 1/3 of their original duration.
- Vehicles and Tamed Animals, which increase the player's speed depending on the biome and may allow the player to fly. All neutral animals except normal crabs may be tamed with a saddle by hitting the animal, but players are more likely to anger the animal than to tame it. The Baby Lava Dragon is the hardest animal in the game to tame, with a 0.2% success rate. The chance of successfully taming an animal may be increased with the Crown of Luck. Vehicles, like most other items, are simply crafted.
Clothing
Clothing are items that offer benefits to the player when worn. These benefits may include warming up or cooling down the player, decreasing incoming damage, increasing speed when riding vehicles/tamed animals, and more. The types of clothing include:
- Helmets: Used to reduce incoming damage from players and mobs. Effects stack with shields. There are 9 tiers: wooden helmet, stone helmet, golden helmet, diamond helmet, crab helmet, amethyst helmet, reidite helmet, dragon helmet and lava helmet. The higher the tier, the more protection it will grant. They offer the same weak protection against players as shields do[note 3] (extended to the dragon and lava tiers), and provide high mob damage protection. In fact, players are immune to spider attacks when wearing the lava helmet.
- Chapkas, Heat Protections, Turbans, and Diving Gear: Used to reduce heat loss, heat gain, heat gain & loss in the Desert, and heat loss in the Ocean/lakes/river, respectively. Chapkas also reduce damage from blizzards, Turbans reduce damage from sandstorms, and Diving Gear also reduces the loss of oxygen while in water. More information on each of these items is available at this page.
- Peasants and Hoods: 2 opposing types of clothing each with 2 tiers: Normal and Winter. Peasants increase the rate at which the player's crops grow: 20% for the Peasant's Tunic and 40% for the Winter Peasant's Tunic. Peasants also prevent stealing from other players with a Hood of the same tier. Hoods allow players to steal a random stack of items[note 4] from another player by hitting them when under 5 conditions:
- It is nighttime.
- The victim is not in range of a fire.
- The stealer is not holding anything in their hand.
- The stealer has not equipped their hood, stolen from a player, or taken damage in the last 8 seconds if they have a normal Hood, or 4 seconds if they have a Winter Hood.
- The victim is not wearing a Peasant of the same tier or higher (Peasant's Tunic blocks Hood, Winter Peasant's Tunic blocks Hood and Winter Hood)
- Hoods and Peasants can also act as Chapkas. Normal Hoods and Peasants typically offer the same warm and blizzard protection as Earmuffs; Winter tier Hoods and Peasants have properties that typically correspond to those of the Coat. There are a few exceptions, which you can read about in this article.
- Vehicle Control Equipment:These need a better name. Any suggestions? These help you when riding Vehicles or Tamed Animals. These include the Pilot Hat, which allows you to take off and accelerate faster when flying, and also acts as a good chapka and excellent turban; and the Pirate Hat, which increases your speed on a Boat, and also warms you in the water.
- Crowns: Crowns come in 3 types: Crown of Life, Crown of Luck, and Crown of the Angel, which are crafted using 200 gold and the Green Gem, Orange Gem, and Blue Gem, respectively. The Crown of the Angel's recipe also requires 1 Dragon Heart. Each grant special powers to the wearer, as well as offer moderate protection against most forms of damage, just like Helmets[note 5].
- The Crown of Life causes the wearer to regenerate 40 units (20%) of their health every 2 ticks or 10 seconds, which is 33% faster than bandages and with unlimited supply. However, to get the Green Gem required to craft this item, the player must not lose any health at all for 4 days or 32 minutes, making this an expensive but powerful item.
- The Crown of Luck increases the wearer's likelihood that a number of chance-based procedures will succeed. These include obtaining special resources with a shovel (x?? chance), successfully taming a mob with a saddle (x5 chance), and getting higher-value loot from treasure chests.
- The Crown of the Angel protects players from death by turning them into a ghost upon receiving fatal damage. As a ghost, the player may not interact with any players, mobs, or structures; their goal is to reach a Resurrection Stone within 1 minute of becoming a ghost. The player will fully die if they have not reached a resurrection stone after 60 seconds. If resurrected, the player will lose all of their weapons (including any super hammers) and two-thirds of their score. Players also turn into ghosts upon death if they have a Dragon Heart in their inventory, but the dragon heart will be consumed upon resurrection, while this Crown may be used indefinitely.
- Other:
- The Bag: This item is automatically equipped when crafted, and can not be removed. In fact, it has no item form at all, meaning that you can only craft it once, immediately equipping it for the remainder of the game (until you die). However, you may still equip other items of clothing while this item is worn. Thus, it does not affect your gameplay at all except by giving you 6 more inventory slots, allowing you to carry 16 different types of items rather than 10. This item is essential for late-game, and makes middle and early-game significantly easier. It is crafted with 5 wolf fur and 6 cord, making it an item that can be crafted in the Forest right after the start of the game, just by killing a few wolves and spiders.
- The Explorer's Hat: This item, when equipped, prevents all mobs from seeing you. This effect, however, is disabled for ?? seconds when the player hits/attacks. However, this item does not protect the player from mob damage; running through mobs, while they will not chase you, can still cause damage to the wearer.
Biomes
Biomes are different places in the world of Starve.io. There are four biomes existing in this game: Forest, Winter, Lava, and Desert (and also Ocean).

Starver in the Forest
Forest
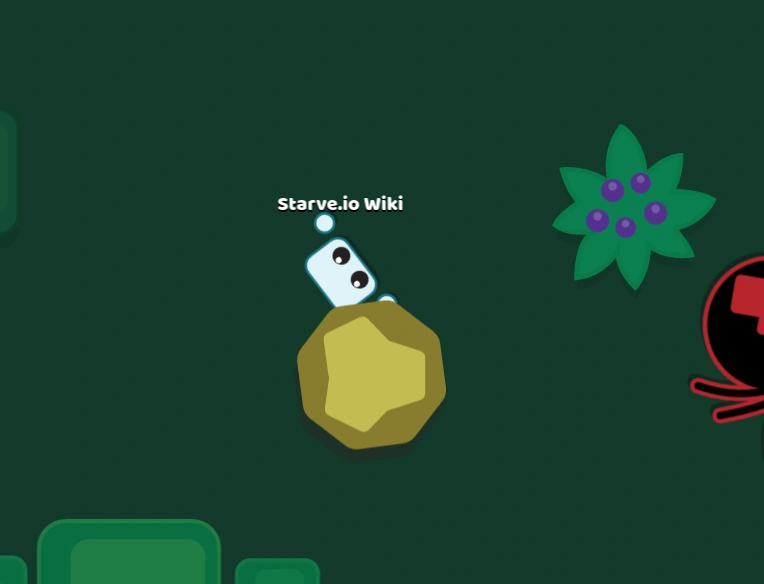
The Forest is the biome that you spawn in. It contains the basic materials to progress through the game. Trees, stones, gold, and berries are the resources that spawn here. Wolves, spiders, rabbits, and boars also spawn here. The Forest biome also has a beach, located on the right side of the biome. This is where you can get sand. Crabs and King Crabs spawn here. It also contains bodies of water that replenish your thirst bar, but don't stay there for too long because you'll lose temperature faster than normal and you'll also lose oxygen over time. When the oxygen bar is empty you'll lose health.

A starver in the winter
Winter
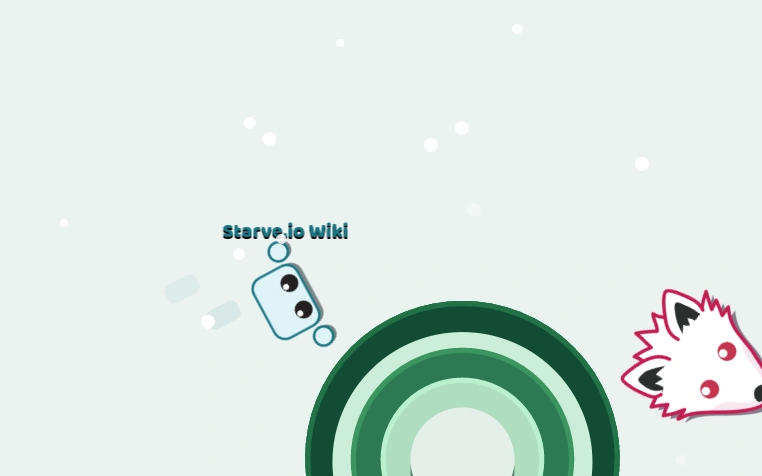
The Winter is different from all biomes because it lowers your temperature by a high amount. You might need a Chapka to survive here (at least an Earmuff). This biome contains some resources to support you progress in the winter. It contains Trees, stones, gold, diamond, and amethyst. This biome does not contains any food sources apart from animals which means you have to get a great amount of food supply. Arctic Foxes, Polar Bears, and Penguins spawn in the outskirts of the Winter biome. Beware, blizzards can happen here, damaging you. You need roofs to stop the blizzard from damaging you. The Winter Biome has a cave that is located the far north of the biome. This is where you can get Diamond ([1]You can still get diamond near outside the cave) and Amethyst (You can get amethyst in Lava Biome too). In the Cave, Baby Dragons and Dragons spawn here. But I may warn you, savage players roam here and you might get killed and lose your valuable progress.

Starver in the Lava Biome
Lava Biome
The Lava Biome is a challenging biome to explore, one thing is your temperature bar, it rises fast even if it's night. This is also where you can only gather Reidite. It contains stones, gold, amethyst and reidite only. It has three mobs: Lava Monster, Baby Lava Dragon, and Lava Dragon. The technique to survive here is to get loads of Ice (100 or more will work). You may use Heat Protections, but it's just a waste of time and resources. Most players travel to Lava Biome first before Desert for better gear. The Reidite is located at the top right corner of the biome, being surrounded by lava. So you basically need Bridges to cross the lava.

Starver in the Desert
Desert
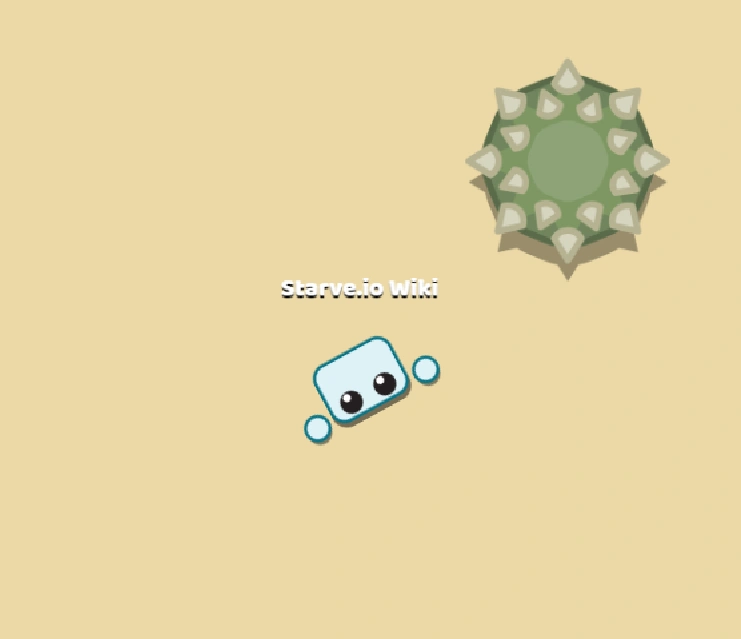
The Desert is the fourth and final biome in Starve.io. It is similar to Lava and Winter Biome because of it's temperature-rising feature and sandstorms. It contains Cacti, Stones, Aloe Vera, and Emerald. It also has an Oasis that has a body of water and has Trees and Stones aswell. You can only gather Emerald in the Desert Biome, you can only mine it with a Amethyst Pickaxe or higher. The Emerald is located at the bottom right corner of the biome. The key to survive is roofs for sandstorms, and Ice for Temperature. Vultures and Sandworms spawn in this biome.


Starver in the Ocean
Ocean
The Ocean surrounds the whole map, and makes you slower like the water bodies in the Desert and Forest Biome. No resources spawn here. But, it has 8 Islands that you can get resources from. Most of them contain Trees, Stones, and Berries. One of them has a mini lava pond (the island that is closest to Lava Biome). The islands also have (sometimes) Treasure Chests.
Containing different items like: Diving Mask/Gear and Super Diving Suit. It contains only two mobs: GMO Piranhas and Krakens. The key to survive and traverse through different biomes via Ocean is using Diving Mask/Gear or Super Diving Suit. And again, beware of savages with Baby Dragon/Baby Lava Dragon who is chasing you in the ocean.
Cite error: <ref> tags exist for a group named "note", but no corresponding <references group="note"/> tag was found
- ↑ Note (Winter)